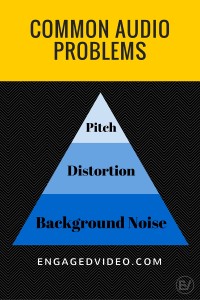
Last week, we talked about the common audio problems you’re likely to run into when filming in-house videos. We also gave you some tips to combat those issues.  However, audio is only part of the equation when putting together great videos. The next headache you may encounter? Lighting problems.
It’s so Dark!
Many of our clients run into the problem of shooting their videos in either low-light rooms that diminish the quality of the finished video or they find themselves filming under stark overhead lightning that creates all kinds of strange shadows. Chances are, if you’re producing video content in your office, you’re facing one of these issues:
- Terrible fluorescent lights
- Offices with windows that let in extremely bright natural light
- Objects obstructing natural light that cast shadows on your subject
- Small out-of-the-way offices that get very little light
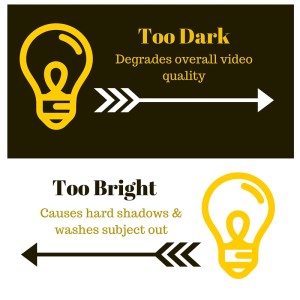
As we discussed in the last blog on audio and the problems inherent with extremes, the same issues are true in lighting situations. Dark situations can degrade the quality of your video and too much light can create distracting shadows or wash your subject out.
What to Do?
Turn on the light! It may seem obvious, but the quickest solution to lighting problems is to shoot your videos in a well-lit room. You’ll want to make sure the lighting you use is even. Focus your lighting goals around eliminating shadows. Create a bright, well-balanced amount of light on your subject in order to preserve overall video quality. If you do a Google search for “Effective Lighting for Video” you’re going to get a bunch of great tips from a variety of sources. The recommendations you’ll get on lighting equipment will vary widely from: A $15 desk lamp from IKEA to a $400 LED variable lighting kit and bounce panels. Here’s the simple reduction of all that information: find lights that look good in YOUR camera and in YOUR room. Every space is different so play to your needs by testing.
What to Buy?
If you want to step up your lighting game by getting some affordable quality gear, consider the following recommendations from Engaged Video’s founder and video aficionado, Zacory Boatright:
- Softbox Lighting
: Softbox lights are really nice at creating well balanced fill light on a subject in dark rooms. The light passes through a simple diffusing material that limits the amount of shadows on the subject by making the light very uniform and even.
- Light Reflectors
: Light reflectors are handy when you are already in a moderately well lit space but one side of your subject isn’t very well lit. Simply use the reflector to catch the natural lighting from the sun or another light source and reflect it onto your subject.
- The Ring Light
: These are incredibly popular and look amazing on single subject shoots for talking head or explainer videos. Subjects with glasses will get a halo effect on their lenses and it won’t look very good, but for subjects with contacts or no glasses this system creates a super uniform light source on the subjects face that look amazing in almost any camera. Here’s an example of it being used by Pentatonix in the music video, “Daft Punk” – In the first shot you can see how evenly the subject is lit, and you’ll notice the little halo of light on his eyes.
- The Ice Light
: The original Ice Light by Westcott is almost $400. This is a cheaper version that accomplishes a lot of the same things at a quarter the price. These LED light tubes are super portable, battery powered and in pairs are some of the best video lights you can buy for the money if you need a portable light kit.
- Ultra Portable Battery Powered LED Lights
: If you need something even more portable look into an affordable portable LED light solution. This unit is less than $40 and can literally light a completely darkened room well enough to record really simple videos. You might also consider getting a cheap light diffuser
to make standing in front of such a light more tolerable for your subjects.
That’s a Wrap!
No matter where you’re filming your videos, just remember a few things that we’ve talked about in this DIY series:
- Audio: Be mindful of background noise, distortion and pitch issues while recording. If viewers can’t hear or understand the message you’re trying to get across, there’s a good chance they’ll simply stop watching. Some simple additions to your audio arsenal can make for a better quality video.
- Lighting: Make sure to film your videos in a space that isn’t too dark or too bright, as you’ll run the risk of degrading the quality of the video, creating harsh shadows or completely washing out your subject. Try to create even lighting centered on the subject of your video to improve overall quality!
Have a Question?
Have a burning question about video production, social media engagement or building a webpage? Leave a comment below! We’re happy to help and, chances are, we’ll turn it into our next blog.


